Cinnamon Roll Pull-Apart Bread: The Ultimate Recipe
Cinnamon roll pull-apart bread represents the perfect marriage between classic cinnamon rolls and shareable bread, creating a dessert that's both visually stunning and irresistibly delicious. Unlike traditional cinnamon rolls that require individual portioning, this bread allows guests to pull away warm, gooey pieces with their hands, making it ideal for brunches, holiday gatherings, and casual weekend mornings. The layered structure creates pockets of cinnamon-sugar filling throughout, ensuring every bite delivers that signature sweet-spice combination.
The beauty of this recipe lies in its versatility. Whether you prefer making dough from scratch, using frozen dinner rolls as a shortcut, or even transforming store-bought cinnamon rolls into something special, the pull-apart format elevates any base into an impressive centerpiece. The bread bakes into a golden-brown loaf with caramelized edges and a soft, tender interior that practically melts in your mouth.
This comprehensive guide will walk you through creating the perfect cinnamon roll pull-apart bread, from mixing the dough to achieving that picture-perfect glaze. You'll learn the techniques that ensure success, discover creative variations, and master the timing to serve this bread at its absolute best.
Classic Cinnamon Roll Pull-Apart Bread Recipe
This recipe creates one beautiful loaf that serves 10-12 people. The intermediate-level recipe requires about 40 minutes of active preparation time, 45-60 minutes for rising, and 35-40 minutes of baking time.
For the Dough:
- 2-3 cups all-purpose flour
- 3 tablespoons granulated sugar
- 1 packet instant yeast (2-1/4 teaspoons)
- 1/2 teaspoon salt
- 3/4 cup water
- 3 tablespoons butter or margarine
- 1 large egg
For the Filling:
- 3/4 cup granulated sugar
- 1 tablespoon plus 1 teaspoon ground cinnamon
- 2 tablespoons butter (very soft)
- 1/4 cup butter (melted)
For the Vanilla Icing:
- 2 cups powdered sugar
- 2 tablespoons butter (very soft)
- 2-3 tablespoons milk
- 1 teaspoon pure vanilla extract
Instructions:
- Combine 1 cup flour, sugar, dry yeast, and salt in a large mixer bowl, stirring until well blended.
- Heat water and butter in a microwave-safe bowl until very warm (120-130°F). The butter doesn't need to melt completely.
- Add the warm liquid and egg to the flour mixture. Beat on medium speed for 2 minutes, scraping the bowl as needed.
- Gradually add enough remaining flour to form a soft dough. Knead on a floured surface until smooth and elastic, about 4-6 minutes.
- Place dough in a greased bowl, turning once to coat. Cover and let rise in a warm place until doubled in size, about 45-60 minutes.
- Punch down the dough and roll into a large rectangle, approximately 12x18 inches.
- Spread the soft butter over the dough surface, then sprinkle evenly with the cinnamon-sugar mixture.
- Cut the dough into 6 equal strips lengthwise. Stack the strips on top of each other, then cut into 6 equal squares.
- Grease a 9x5-inch loaf pan and line with parchment paper for easy removal. Stack the dough squares vertically in the pan, cut edges facing up.
- Brush with melted butter, cover, and let rise until doubled, about 30-45 minutes.
- Preheat oven to 350°F. Bake for 35-40 minutes until golden brown and cooked through. If the top browns too quickly, tent with aluminum foil.
- Cool in the pan for 10 minutes, then transfer to a serving platter.
- Prepare the icing by beating together powdered sugar, soft butter, milk, and vanilla until smooth. Drizzle generously over the warm bread.
Understanding the Pull-Apart Technique
The distinctive appearance and texture of pull-apart bread comes from its unique assembly method. Rather than rolling the dough into a log like traditional cinnamon rolls, you stack layered pieces vertically in the pan. This creates natural separation points that allow pieces to pull away easily while maintaining structural integrity during baking.
The stacking method also maximizes the surface area exposed to butter and cinnamon sugar. Each layer gets coated individually before assembly, which means more of that delicious filling permeates the bread. When the dough rises and bakes, the layers fuse together just enough to create a cohesive loaf while maintaining distinct sections.
The vertical orientation in the loaf pan creates an accordion-like effect. As the dough expands during the second rise and baking, the layers press against each other, creating those characteristic ripples and valleys. This texture isn't just visually appealing - it also creates more crispy edges and caramelized surfaces than a traditional rolled cinnamon bread would offer.
Time-Saving Shortcuts and Variations
Not everyone has time for yeast dough from scratch, and that's perfectly acceptable. Using 16 frozen dinner rolls or two cans of refrigerated biscuit dough transforms this recipe into a quick project. Simply thaw frozen rolls according to package directions, cut each in half, and proceed with the butter-dipping and sugar-coating process. The prep time drops to about 25 minutes, though you'll still need to allow for rising time.
For an even faster version, pre-made cinnamon rolls work beautifully. Take 10 store-bought cinnamon rolls, allow them to thaw in the refrigerator overnight for at least 6 hours, then dip each roll in melted butter and roll in cinnamon sugar before arranging in the pan. This method requires virtually no skill while still producing impressive results. The rolls should overlap slightly in the pan, and you'll follow the same rising and baking process.
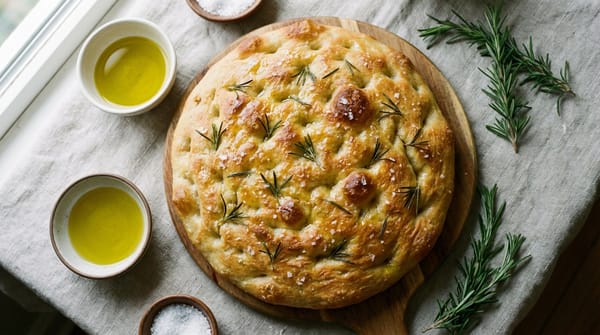
Another creative twist involves using sourdough focaccia dough as the base. This creates a more complex flavor profile with the characteristic tang of fermented dough complementing the sweet cinnamon filling. The focaccia's naturally airy texture produces an exceptionally light pull-apart bread that feels less heavy than traditional versions. This variation works particularly well for those who find standard cinnamon rolls too sweet, as the sourdough provides balance.
Achieving the Perfect Texture
The ideal cinnamon roll pull-apart bread should be soft and tender throughout with slightly crispy, caramelized edges. Several factors influence the final texture, starting with proper dough hydration. The dough should be soft and slightly tacky but not sticky - if it clings to your hands excessively, work in a bit more flour during kneading.
Kneading develops the gluten structure that gives the bread its characteristic chew and helps it hold together despite the layered construction. Under-kneaded dough will produce a crumbly bread that falls apart too easily, while over-kneaded dough becomes tough and dense. The dough is ready when it feels smooth, elastic, and springs back when poked.
Rising time significantly impacts texture as well. The first rise should continue until the dough has truly doubled in size - this can take anywhere from 45 minutes to 2 hours depending on room temperature. A cooler kitchen means slower rising, which actually develops better flavor. The second rise after assembly is equally important; rushing this step results in dense bread with less volume. The assembled loaf should look puffy and fill the pan before baking.
Baking temperature and time require attention to prevent dry bread. An oven temperature of 350°F provides gentle, even heat that cooks the interior without over-browning the exterior. If your bread browns too quickly, tent it with foil for the remaining baking time. The bread is done when it reaches an internal temperature of 190°F and sounds hollow when tapped.
Flavor Enhancements and Creative Add-Ins
While classic cinnamon sugar filling never disappoints, numerous variations can customize this bread to your preferences. Brown sugar instead of white sugar creates deeper caramel notes and a slightly chewier texture in the filling. Mixing half brown sugar and half white sugar provides the best of both worlds - complexity from the molasses in brown sugar with the clean sweetness of white sugar.
Spice combinations beyond plain cinnamon add dimension. A pinch of nutmeg or cloves in the filling evokes the warmth of fresh doughnuts. Cardamom brings a sophisticated, slightly floral note that pairs beautifully with cinnamon. For a chai-spiced version, combine cinnamon with cardamom, ginger, and a tiny amount of black pepper.
Nuts add textural contrast and richness. Chopped walnuts or pecans can be sprinkled between layers or mixed into the cinnamon sugar. Toast the nuts first to intensify their flavor and ensure they stay crunchy during baking. Dried fruit like raisins, cranberries, or chopped dates provides chewy sweetness and visual interest.
The glaze offers another opportunity for customization. A lemony glaze made with powdered sugar, vanilla extract, and fresh lemon juice brightens the rich bread with citrus notes. Cream cheese frosting creates an indulgent, tangy topping reminiscent of classic cinnamon roll icing. For a sophisticated finish, brown butter before mixing it into the glaze - the nutty, caramelized notes complement the cinnamon beautifully.
Make-Ahead and Storage Strategies
Cinnamon roll pull-apart bread adapts well to advance preparation, making it practical for holiday mornings when you want fresh-baked bread without early-morning stress. The most effective make-ahead method involves preparing the dough through the first rise, assembling the loaf in the pan, then covering tightly and refrigerating overnight. The cold temperature slows the yeast activity, allowing a long, slow rise that develops excellent flavor.
In the morning, remove the pan from the refrigerator and let it sit at room temperature for 30-60 minutes while the oven preheats. The bread may not look dramatically puffy, but it will rise significantly during baking. This cold-start method actually produces superior texture in many cases, as the extended fermentation creates a more tender crumb.
For longer storage, unbaked assembled loaves freeze beautifully. Prepare the bread through assembly, wrap the pan tightly in plastic wrap and aluminum foil, then freeze for up to 3 months. To bake, thaw in the refrigerator overnight, allow to come to room temperature for about an hour, then bake as directed. You may need to add 5-10 minutes to the baking time.
Baked bread keeps at room temperature for 2-3 days when stored in an airtight container or wrapped tightly in plastic wrap. The texture remains good, though the bread tastes best within 24 hours of baking. Reheat individual portions in the microwave for 15-20 seconds to restore that fresh-from-the-oven softness. Avoid refrigerating baked bread, as this accelerates staling and creates a dry texture.
Troubleshooting Common Issues
Dense, heavy bread typically results from insufficient rising time or too much flour in the dough. Always measure flour by spooning it into the measuring cup and leveling off rather than scooping directly from the bag, which compacts the flour and leads to excess. If your kitchen is cold, create a warm rising environment by turning your oven to the lowest setting for 1 minute, turning it off, then placing the covered dough inside.
Bread that falls apart too easily indicates under-kneading or cutting the dough pieces too small. The dough needs adequate gluten development to maintain structure despite the layered assembly. Knead for the full recommended time, even if the dough looks smooth earlier. When cutting the stacked dough, aim for pieces about 2 inches wide - smaller pieces create more separation but less structural integrity.
Uneven browning happens when the oven temperature is too high or the bread sits too close to the heating element. Use an oven thermometer to verify your oven's actual temperature, as many ovens run hot or cold. Position the rack in the center of the oven, and rotate the pan halfway through baking if your oven has hot spots. Tenting with foil prevents over-browning while allowing the interior to finish cooking.
Dry bread often stems from overbaking or too much flour in the dough. Start checking for doneness at the minimum recommended time, and remove the bread as soon as it reaches 190°F internally. Brushing the warm bread with melted butter immediately after baking adds moisture and prevents the crust from becoming too hard. Apply the glaze while the bread is still warm so it soaks in slightly rather than just sitting on the surface.
Serving Suggestions and Presentation
Cinnamon roll pull-apart bread shines as a centerpiece for brunch tables, holiday breakfasts, or afternoon coffee gatherings. Serve it on a large platter or wooden board, placing it whole so guests can pull off pieces themselves. This interactive serving style encourages conversation and creates a casual, communal atmosphere. Provide small plates and napkins nearby, as the bread can be delightfully messy.
Temperature matters significantly for optimal enjoyment. The bread tastes best served warm, when the layers are soft and the glaze is slightly melty. If you've baked it ahead, reheat the entire loaf in a 300°F oven for 10-15 minutes before serving. Individual pieces can be warmed in the microwave, though this softens any crispy edges.
Beverage pairings enhance the experience. Coffee is the classic choice, with its bitter notes balancing the bread's sweetness. Hot chocolate or chai tea complement the cinnamon spicing beautifully. For a more elegant brunch, consider serving alongside champagne or mimosas - the bubbles and acidity cut through the richness.
Leftover bread transforms into other treats. Cube it and use as the base for a decadent bread pudding. Toast slices and serve with butter for a special breakfast. Or turn it into French toast by dipping pieces in an egg mixture and pan-frying until golden. The cinnamon flavor intensifies with these preparations, creating something entirely new from yesterday's bread.
Conclusion
Cinnamon roll pull-apart bread delivers all the flavor and comfort of traditional cinnamon rolls in a format that's both easier to serve and more visually impressive. The layered structure creates maximum surface area for that irresistible cinnamon-sugar filling while producing a bread that's fun to eat and perfect for sharing. Whether you make the dough from scratch, use frozen rolls as a shortcut, or transform store-bought cinnamon rolls, the pull-apart technique elevates the final product into something special.
Success with this recipe comes down to a few key principles: properly developed dough with adequate rising time, generous application of butter and cinnamon sugar to each layer, and careful attention to baking temperature and time. The make-ahead flexibility means you can enjoy fresh-baked bread without morning stress, while the numerous variations allow you to customize flavors to your preferences. From classic cinnamon to creative spice blends and add-ins, this bread adapts to any occasion or taste.
Master this recipe, and you'll have a go-to showstopper for brunches, holidays, and any time you want to treat yourself or others to something truly special. The combination of tender bread, sweet cinnamon filling, and creamy glaze creates an experience that's greater than the sum of its parts - proof that sometimes the best recipes come from reimagining classics in new and exciting ways.
Sources
- Fleischmann's Yeast - Cinnamon Roll Pull-Apart Bread
- Pillsbury - Grands Cinnamon Pull-Apart Bread
- AP News - Milk Street Bakes Monkey Bread Recipe
- Alison's Pantry - Cinnamon Roll Pull Apart Bread
- Bowl Me Over - Pull Apart Cinnamon Rolls
- Humbly Homemade - Cinnamon Pull-Apart Bread
- Cambrea Bakes - Cinnamon Roll Monkey Bread
- Heart of the Home - Pull-Apart Cinnamon Roll Sourdough Focaccia
- Mighty Mrs - Easy Cinnamon Pull-Apart Bread